Tag Archive for: Recipe

So you made your lovely French bread…today I want to share something that we make with that wonderful bread! These sandwiches are incredibly simple and flavorful This is something you can prep ahead of time and make even on a weekday. We used a spicy sausage (habanero pork sausage from our local Whole Foods) which was a nice complement to the sweet peppers. An addition of some tomato adds some depth; they basically disintegrate and create a wonderful sauce. It’s a really great dish for fall; hearty without being heavy. Yum! What do you think??

Kelly

Sausage Sandwiches with Peppers and Onions

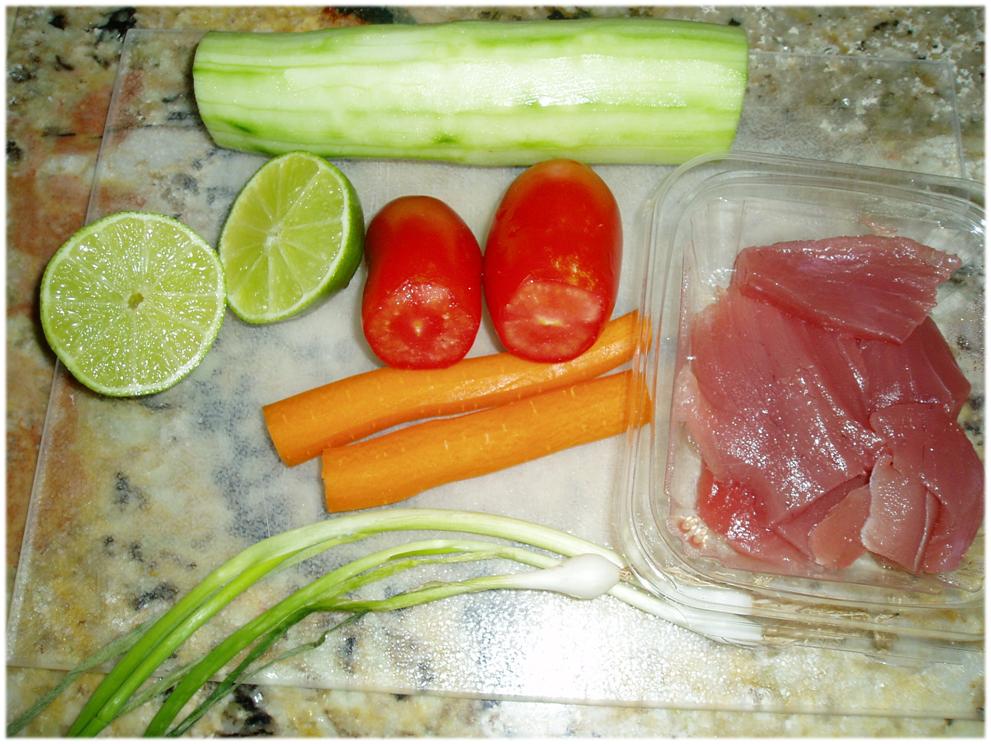
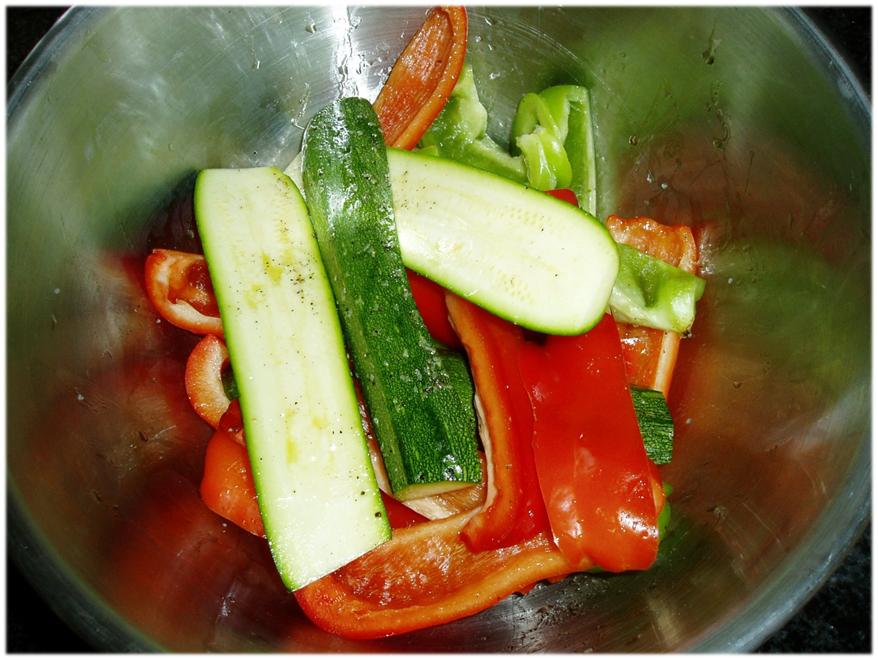
3 Bell Peppers (Assorted Colors)
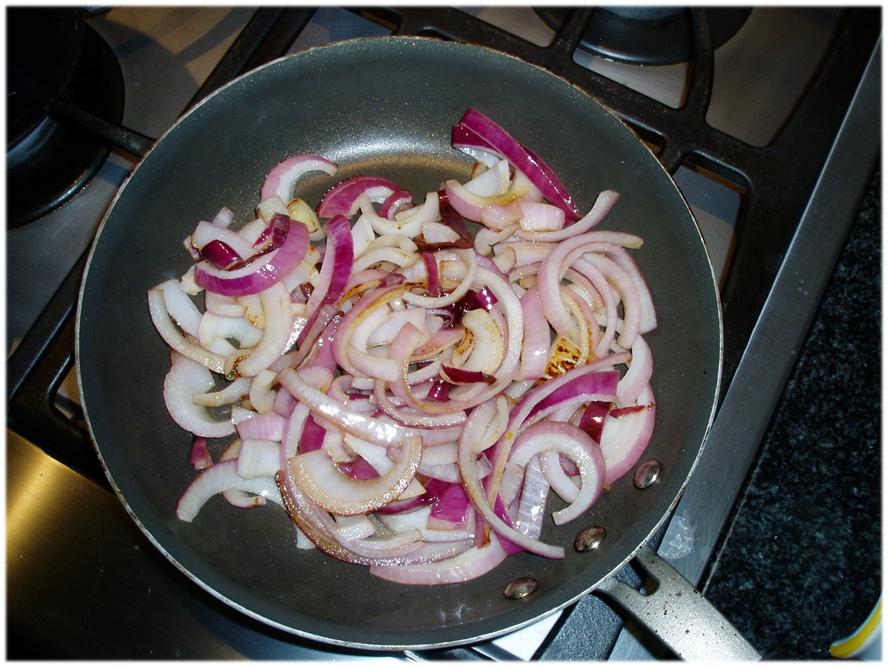
1 Large Onion
1 Tomato
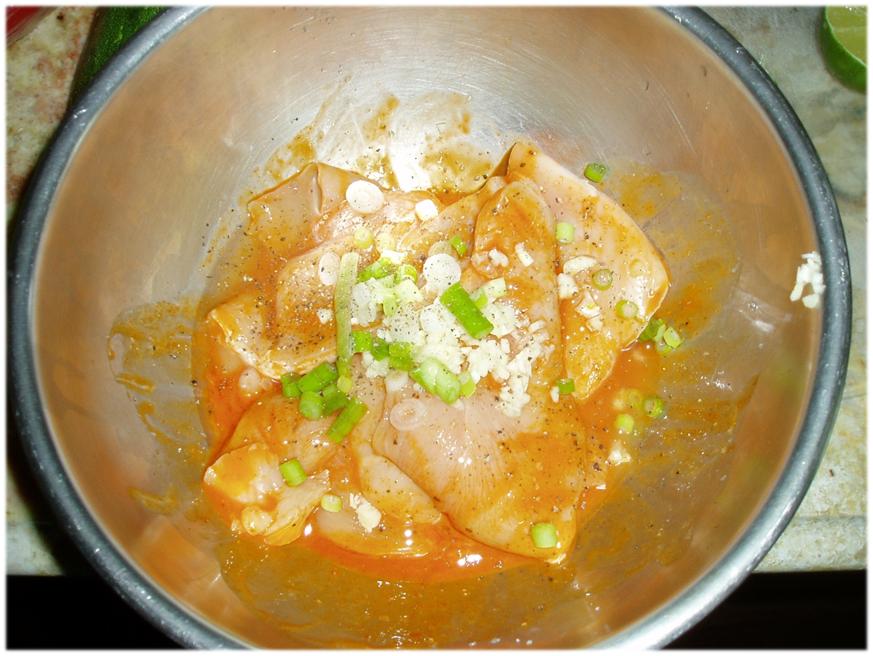
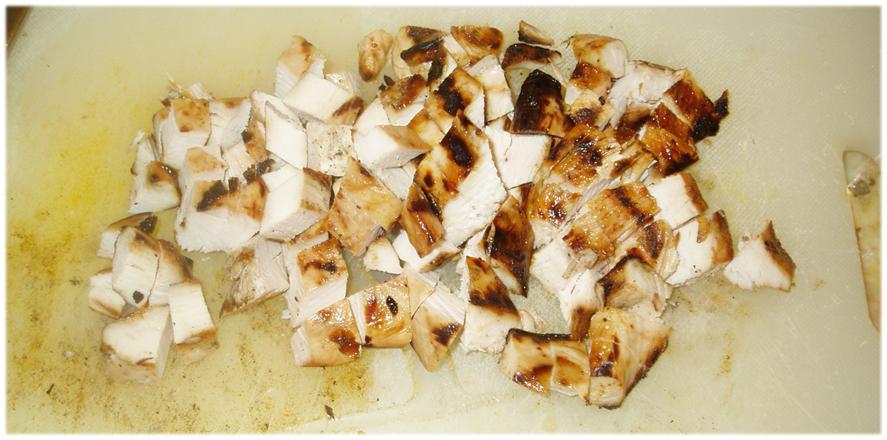
1 Pound pork sausage
1 T Worcestershire Sauce
½ C Red Wine
1 T Olive oil
Salt and Pepper
1 baguette
Parmesan cheese (for garnish)
Slice the peppers and onions lengthwise, keeping the onions separate.

Slice the sausages on the diagonal using a good knife (putting the sausages in the freezer for a half an hour before you slice them will help.)

Preheat the oven to 350° and place the bread in the oven whole. Heat the olive oil in a large skillet over medium high heat. Add the sausage to the pan and brown on both sides, about 4 minutes.

Move the sausage to the outside of the pan, then add the onions to the center of the pan.

Allow the onions to soften, about 2 minutes, then add the peppers and toss the ingredients together.

Allow to cook about 1-2 minutes before adding the tomatoes and the liquid ingredients. Season with salt and pepper.

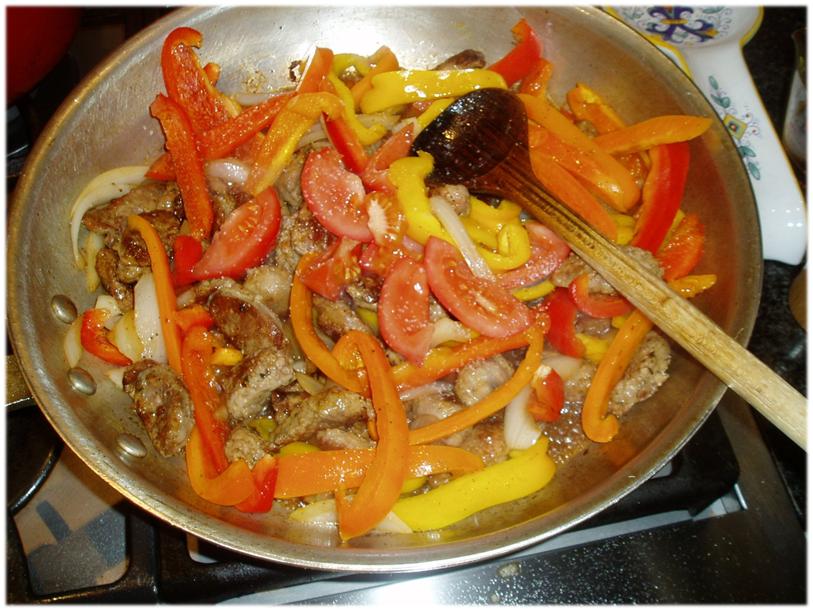
Cook to reduce the sauce by half.

Slice the bread in half lengthwise and cut into sandwich sized pieces. Serve the sausage and pepper mixture on the open bread making sure to spoon some sauce on top. Garnish with some grated parmesan cheese.

Enjoy!
PS. Don’t worry if there are leftovers, we will show you a way to use them coming up!!

Vacationing in Aspen, we came across some beautiful Olathe sweet corn. Our Colorado corn can be really good at the end of summer. Lazy day rummaging through my hosts’ cookbook collection I found a side dish to try. Only thing was that we wanted a main dish. The recipe (from Gourmet) admonished the reader not to try to improve it . Hmmph. A challenge. What we ended up with was nothing like the original. I decided to use our favorite way to spice up something bland; marinate it in hot sauce. We didn’t have Franks Wing Sauce that day and we used an exotic Hawaiian hot sauce, though I can’t remember the name. Franks always works though. I tried it again when I got home and it was still great.
Summer Shrimp

1lb shrimp.
4 ears corn
Basil and or mint
Scallions
1-2 Large Tomatoes
Franks Wing Sauce (regular)
Butter
Salt
Pepper

Peel the shrimp if necessary. Pour ¼ c. Franks Wing Sauce in a bowl. Add shrimp. Set aside to let marinate while preparing the rest.

Remove the corn from the ears. A bundt pan helps here putting the corn in the circle and scrape down so the kernals fall into the pan.

Melt 1T butter in a frying pan, add 1T olive oil.

Drain the shrimp, leaving the residual sauce on. Saute shrimp until pink and curled, about 2 minutes. Sometimes the shrimp will exude liquid. If that happens reduce the sauce or drain again.

Remove shrimp to a plate and set aside. Melt one more Tablespoon of butter to the shrimp pan, now empty. Add corn and sauté for 2 minutes, or till warm. Add the reserved shrimp and chopped tomatoes. Pepper generously and salt with celtic salt.

Remove from heat and tear basil and mint on top and serve.

It’s super fresh this way. But a little bacon would be nice…

Mary

This week seems to have gotten away from me! I am a bit behind on posting, but I thought I would share with you a fabulous summer pasta dish. When you have lots of zucchini around, this is a great way to use it. Not to mention this dish has bacon…umm yum. (Ali says that everything should come with bacon and a biscuit! Gotta go to the DMV? Here is your bacon and a biscuit!) Anyway, the bacon works quite well here. This may not be the lowest calorie dish, but it is amazing and so silky. I made this for an impromptu dinner for some friends and we killed the dish. It was fabulous! This is from Jamie at Home by Jamie Oliver. I love Jamie’s food and the whole concept of knowing what goes into your food and where it came from. It is something we strive for with regular trips to the farmers’ market and by growing some things at home. I would love to do more, but even the small steps make a difference. Do you have strategies for eating local and wholesome? I would love some tips! For now, go find some fabulous zucchini and try this one out!

Kelly

Beautiful Zucchini Carbonara

Courtesy of ‘Jamie at Home’ by Jamie Oliver

Sea salt and freshly ground black pepper
6 medium green and yellow zucchini
1 pound penne
4 large free-range or organic egg yolks
½ cup heavy cream
2 good handfuls of freshly grated Parmesan cheese
Olive oil
12 thick slices (about 1 pound) of bacon, cut into chunky pieces
Small bunch of fresh thyme, leaves picked and chopped, flowers reserved (if you can find flowering thyme)
Optional: a few zucchini flowers
Bring a large pot of salted water to a boil.

Halve and then quarter zucchini lengthwise. Cut out and discard any fluffy middle bits, and slice the zucchini at an angle into pieces roughly the same size and shape as the penne. Smaller zucchini can simply be sliced finely. Your water will now be boiling, so add the penne to the pan and cook according to the packet instructions.
To make your creamy carbonara sauce, put the egg yolks into a bowl, add the cream and half the Parmesan, and mix together with a fork. Season lightly and put to one side.
Heat a very large frying pan (a 14 inch one is a good start – every house should have one!), add a good splash of olive oil and fry the pancetta or bacon until dark brown and crisp.

If there is a lot of fat, you can pour some of it off. Add the zucchini slices and 2 big pinches of black pepper, not just to season but to give it a bit of a kick. Sprinkle in the thyme leaves, give everything a stir, so the zucchini become coated with all the lovely bacon-flavored oil, and fry until they start to turn lightly golden and have softened slightly.
It’s very important to get this next bit right or your carbonara could end up ruined. You need to work quickly. When the pasta is cooked, drain it, reserving a little of the cooking water.Immediately, toss the pasta in the pan with the zucchini, bacon and lovely flavors, then remove from the heat and add a ladleful of the reserved cooking water and your creamy sauce. Stir together quickly. (No more cooking now, otherwise you’ll scramble the eggs.)

Get everyone around the table, ready to eat straight away. While you’re tossing the pasta and sauce, sprinkle in the rest of the Parmesan and a little more of the cooking water if needed, to give you a silky and shiny sauce. Taste quickly for seasoning. If you’ve managed to get any zucchini flowers, tear them over the top, then serve and eat immediately, as the sauce can become thick and stodgy if left too long.

This is all that was left!! Enjoy J

Like most of the nation, we are feeling the heat this week. I know, I know, I shouldn’t complain. After all, we are in Colorado and have relatively low humidity, but it is still H-O-T. So my usually creative menu is uninspired. I don’t feel like cooking (or even thinking about turning on the stove.) So what to do? Mary had an inspired idea requiring no cooking at all: Poisson Cru. Think sushi-grade tuna with all kinds of goodness. This recipe is inspired by one of our favorite athletes, pro surfer, Laird Hamilton. I find him one of the most inspiring athletes ever. His book is amazing and a great read. This recipe is awesome for a hot day when you don’t want to worry about cooking. It takes about 10 minutes of prep and 15 minutes to marinate. If you have never tried (or prepared) raw fish, this is a great recipe to try. There is so much flavor and the texture is perfect. We served this with toasted French bread, but you could eat it on its own, with crispy won tons, etc. The possibilities are endless. We usually make this more in the Poke style with a teriyaki-like sauce while this incorporates coconut milk in the Tahitian style. Both are wonderful, but I have to say; this hit the spot! How are you beating the heat?

Kelly & Mary

Poisson Cru

Based on ‘Force of Nature‘ by Laird Hamilton

½ C Coconut Milk

½ C Fresh Lime Juice

2 Scallions, Chopped

1 Large Tomato, Diced

1 Small Cucumber, Peeled, Seeded, and Diced

2 Carrots, Diced

*Zest of 2 limes

1 lb. Sushi-grade Ahi Tuna, Cut Into ½” Cubes

Crushed red pepper to taste

Sea Salt and Black Pepper to taste

Fresh mint leaves (optional)


In a large glass bowl, combine the milk, lime juice, scallions, tomato, cucumber, carrots, *zest, salt and pepper.

Add the tuna and let marinate for 15 minutes.

Drain the excess liquid and serve immediately.

I am always looking for ways to make flavorful and healthy dinners during the week. It is always a challenge when you are busy and don’t feel like cooking at the end of the day, so things that can be prepped ahead of time or quickly are always the answer. I often opt for some semi-homemade options to supplement these meals. This is one that is great because it is easy to prepare and you can do pieces early in the day or right before cooking. Plus, you can throw some additional chicken and veggies in to save for lunches later in the week. I like to take the leftover rice and mix in chopped chicken and veggies for a great easy lunch! By skipping the cheese and sour cream included with lots of Mexican food, you can save lots of calories. This has so much flavor, I didn’t miss it. Enjoy!!

Kelly

Grilled Chicken Fajitas

1 Pound Chicken Breasts

2 Red Bell Peppers

1 Green Bell Pepper

1 Zucchini

1 Red Onion, Sliced

1 Avocado

2 T Olive Oil

Salt and Pepper to Taste

Mission Fajita Tortillas


Marinade:

3 T Frank’s Red Hot Wing Sauce

Juice of ½ a Lime

2 T Red Wine Vinegar

1 Clove Garlic, finely chopped

2 Scallions, finely chopped

Salt and Pepper to Taste


Rice:

Near East Spanish Rice

1 Tomato, cubed


Beans:

365 Organic Refried Beans

Jalapeños

Juice of ½ Lime

Cumin

Salt and Pepper to Taste


Combine all marinade ingredients in a bowl and coat chicken with the mixture.


Cover the chicken and refrigerate until ready to grill (ideally 30 min – about 10 hours.) Prep the veggies by cleaning them and cutting them into manageable pieces to grill (quarter the peppers and slice the zucchini lengthwise.) Toss the veggies in 1-2 T olive oil and salt and pepper.


Slice the onion and set aside.


Prepare the rice according to the package directions and add chopped tomatoes after about 10 minutes of cooking.


Add 1 T olive oil to a skillet and cook the onions over med-high heat until golden.


Heat the black beans in a skillet over medium heat until warmed through, stirring in the jalapeños, lime juice, and spices. (Black beans do NOT photograph well, but they taste yummy!)


Grill the veggies and the chicken, let rest for a few minutes then slice into strips.


Heat the tortillas and serve immediately.


PS – When Ali got home late after work, she reinvented this by using lettuce in place of the tortillas which looked Fabulous! Gotta love new ideas! Do you have other ways to do fajitas??

Tortilla soup is something that takes many forms now-a-days. You can have chunky or silky, low-fat or not so much. This particular version is a new favorite of ours. This is a soup made super smooth with the use of a blender with all the chunks added to the bowl. I love that you can pick your own toppings and everyone gets what they want. I tend to like this a little spicier, so I add a couple different chili (ancho and guajillo) powders to the original recipe. Not everyone loves it that way, so if you stick with the traditional dried pasilla (negro) chile, you will get a smoky, sweet, mild heat. We make chicken stock on a regular basis and I often make this using that. I really do think the homemade broth makes a big difference, but you can absolutely use store bought with great results. Add this healthy comfort food to your arsenal!

Kelly

Sopa Azteca

Adapted from Rick Bayless‘ Mexican Everyday

Serves 4 to 6

Recipe from Frontera Grill/Topolobampo

1 large dried pasilla (negro) chile, stemmed and seeded

One 15-ounce can diced tomatoes in juice (preferably fire-roasted)

2 tablespoons olive oil

1 medium white onion, sliced 1/4-inch thick

3 garlic cloves, peeled

2 quarts chicken broth

1 large epazote sprig, if you have one (I have not tried this yet but it’s on my radar)

4 (about 1 1/4 pounds total) boneless, skinless chicken breast halves, cut into 1/2-inch cubes

1 large ripe avocado, pitted, flesh scooped from the skin and cut into 1/4-inch cubes

1 1/2 cups (6 ounces) shredded Mexican melting cheese (like Chihuahua, quesadilla or asadero) or Monterey Jack, brick or mild cheddar

A generous 4 cups (about 6 ounces) roughly broken tortilla chips

1/2 cup Mexican crema, sour cream or creme fraîche for garnish

1 large lime, cut into 6 wedges, for serving

Quickly toast the chile by turning it an inch or two above an open flame for a few seconds until its aroma fills the kitchen. (Lacking an open flame, toast it in a dry pan over medium heat, pressing it flat for a few seconds, then flipping it over and pressing it again.) Break the chile into pieces and put in a blender jar along with the tomatoes with their juice. (A food processor will work, though it won’t completely puree the chile.)


Heat the oil in a medium (4-quart) saucepan over medium-high. Add the onion and garlic and cook, stirring frequently, until golden, about 7 minutes.


Scoop up the onion and garlic with a slotted spoon, pressing them against the side of the pan to leave behind as much oil as possible, and transfer to the blender. Process until smooth.


Return the pan to medium-high heat. When quite hot, add the puree and stir nearly constantly, until thickened to the consistency of tomato paste, about 6 minutes.


Add the broth and epazote, if using. Reduce the heat to medium-low and simmer for 15 minutes. Taste and season with salt, usually about a generous teaspoon (depending on the saltiness of the broth).


Just before serving, add the chicken to the simmering broth. Divide the avocado, cheese and tortilla chips between serving bowls.


When the chicken is done, usually about 5 minutes, ladle the soup into the bowls. Garnish with the crema. Pass the lime separately.


YUMMY!

A trip to the farmer’s market left us with piles of early lettuce, arugula, French radishes and tomatoes. Instead of spending $100 on each of us getting a nice Filet, we bought one ½ pound beef tenderloin filet for $12 at the “nice” store, since we are hardly going to cook it. The question was whether to grill the steak or pan fry. I wanted this to be almost raw, a quick sear on each side to make a crust, so I didn’t know if the (disappointing Jenn-Air) gas grill would get hot enough. So I pulled out my old trusty cast iron pan. I figured, searing hot, 2 minutes per side, to break down the fat and get a nice crust. And, frankly, it came out perfect.
Prep your salad by washing and drying your lettuce. Make salad dressing by combining 2 T. good olive oil plus 1 ½ t. sherry vinegar, a crushed clove of garlic and salt and pepper. Shake well and set aside until later. You can do all this ahead and chill while you take a nap after the Farmer’s market!
After your nap, cut up tomatoes, radishes, cabbage and measure your capers and shave the Parmesan. We like to lay all the ingredients out in our salad bowl.

Next, trim off the silver skin (that the expensive store left on). Crush some peppercorns, with the heavy cast iron pan. The heavy pan will keep the pepper from flying away! Preheat the pan until SUPERhot on high. Add 1 T. Canola Oil and spread around the pan. Cover the steak with the crushed pepper and some Celtic salt. Press onto the meat so it stays on. Put the steak in the pan fat side down (on its side) for 2 minutes. It will smoke, don’t worry, just turn on your fan. Flip and cook 2 minutes per side. Let steak rest for 5 minutes.

Toss salad. Slice steak against the grain and into super thin slices.

Add cooked steak to the top of the salad. YUM!

Mary

There are some meals that you just go back to over and over again; this is one of mine. I started making this in college because my best friend, Robin,  LOVED fried rice and we were looking for a way to make a healthy version at home. I started with this recipe from Tyler Florence but, as usual, I didn’t have all the ingredients, so I improvised. Since then, I have tweaked it and made it my own. Though I often throw in extra vegetables I have laying around or make substitutions, this is my favorite combination. The keys to this recipe are the fresh ginger and Hosin sauce, other than that, play around. We often cook extra chicken or beef on the grill to have on hand for lunch or so we have it available for recipes like this. You could also use shrimp or rotisserie chicken to make it easy. I like short grain brown rice for this, though it is traditionally made with white rice, there is enough flavor that people don’t notice the substitution. Plus, I think the brown rice gives it a nice bite. This is such a versatile recipe and super easy to make!

Kelly

Chicken Fried Rice

Ingredients
2 cups short-grain brown rice
4 cups cold water
1 (1-inch) piece ginger, peeled and sliced in 1/2
1 tablespoon kosher salt
1 tablespoon sesame or olive oil
1 teaspoon Mongolian Fire Oil (optional)
4 scallions, sliced thin (reserve some of the green part for garnish)
1 (1-inch) piece ginger, peeled and finely chopped
2 cloves garlic, chopped
1 carrot, chopped
1 cup sugar snap peas, chopped
1 cup pineapple, cubed
½ red bell pepper, chopped
1 egg, lightly beaten
¼ cup orange juice
3-5 tablespoons low-sodium soy sauce
1 ½ tablespoons hoisin sauce
2 chicken breasts, cooked and chopped
In a pot with a tight fitting lid, add the rice and 4 cups cold water. Put in the ginger and salt. Bring to a boil, reduce to a simmer, cover, and cook for 15 to 20 minutes. Remove from the heat and set aside for about 10 minutes. (I usually use a rice cooker so I don’t have to watch it, but you can prepare on the stovetop).

While the rice is cooking, prep the vegetables and chicken. Try to make all the pieces roughly the same size so they cook evenly.

Heat a wok or large nonstick skillet over medium-high heat. When it is hot, pour in the sesame oil. Add the scallions, ginger, and garlic; stir-fry for 1 minute until fragrant.

Stir in the vegetables and orange juice leaving out the pineapple and cook for about 2 minutes.

Stir in the chicken to reheat, about 1-2 minutes.

Remove the ginger from the rice and add the rice and pineapple to the wok; stir everything together and break up any clumps of rice.

Add the soy and hoisin and stir some more.

Pour in the egg and stir-fry until cooked, about 1-2 minutes. Taste for seasoning and add more soy sauce if needed.

Stir in the additional green onion and serve.

Sunday breakfast often seems to be the time for eggs and bacon or wonderful pastries, but in our house, Saturday is for lighter fare. This morning we threw together a quick smoothie that turned out delicious! Smoothies are one of those great things that are easy to make and allow for creativity. I have to admit, not all of my smoothies come out perfect, but I have fun playing with it! We had cappuccinos this morning, so we didn’t need more espresso, but this smoothie would be great with a shot of espresso added! Try it and let me know what you think.

Kelly

Saturday Smoothie

2 T Almond Butter
1 Banana (Frozen)
½ c Frozen Peaches
2 Scoops Chocolate Protein Powder
1 c Skim Milk
Combine all ingredients in a blender and blend on high speed until smooth. Add more liquid if necessary. Serve immediately.

I woke up this morning and knew that scones were the only way to celebrate the Royal Wedding today! This recipe is a light all-purpose rendition. We have in the past added crystalized ginger to the dough with great success. You could add almost anything to make them your own! They also store quite well, unbaked, in the freezer. I decided to keep it simple this morning and served them with my favorite Huckleberry jam and strawberries.

Buttermilk Scones

Courtesy of The SONO Baking Company Cookbook

2 cups all-purpose flour, plus more for dusting

2 T sugar

1 T baking powder

1 t coarse salt

1/2 t baking soda

6 T chilled butter cut into small pieces

3/4 cup buttermilk

  1. Line a baking sheet with parchment and set aside.
  2. In a large bowl, whisk together flour, sugar, baking powder, salt, and baking soda.
  3. Work butter into the dry ingredients with your fingers until it resembles coarse crumbs. Add 1/2 cup of buttermilk and fold together then continue adding buttermilk 1 T at a time until the dough just comes together and there are no dry spots.
  4. Turn out the dough onto a lightly floured surface. Divide into two balls. Form each ball into a 7 inch disk, 3/4 inch to 1 inch thick. Using a scraper or a sharp knife cut each disk into 6 equal wedges. Place wedges on prepared baking sheet and chill for 1 hour.
  5. Preheat oven to 400°
  6. Bake on middle rack for 16-20 minutes, until golden brown. Rotate about 2/3 of the way through.
  7. Cool on the baking sheet for 10 minutes.
  8. ENJOY!