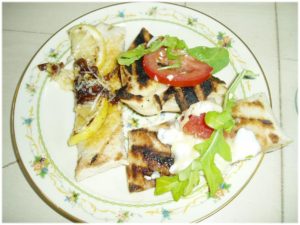
Pizza is one of those foods that everyone loves. You can top it with anything you, use creative sauces and really let your imagination run wild! But sometimes, it is just too hot to cook with a 500 degree oven during the summer!
When its 100 outside its time to take your hankering for good pizza outside. Pizza is been something we have worked on for a long time and have pretty much perfected our technique, but everything changes when you take it outdoors.
Grilled pizza has its benefits, starting with keeping your kitchen cool! You also get that lovely charred flavor that you just can’t get in the oven. And if you have some dough hanging out in the freezer, it saves on the mess! There are several ways that you can go about grilling pizza.
You can use a gas or charcoal grill, but the real key is having different heat zones. By giving yourself the flexibility of having different temperatures to work with, you can better control the final product. If you are using charcoal, mound up the charcoal on one side of the grill. You could also multi-task by using both a charcoal and a gas grill. Start on the higher heat of the charcoal and then move to a low gas grill to melt the cheese and cook the toppings.
This time we let our multi-tasking get the better of us (by cooking Beer Can Chicken on the gas grill at the same time) and didn’t end up with a cool enough part of the grill for melting. The next day, I was feeling a bit impatient and just fired up the gas grill and probably could have let it go a little longer. Alas, practice makes perfect!
Oh, one other tip: try to use toppings that are on the lighter side (by weight) so as not to weigh down the dough. Toppings that are already cooked are the way to go. I tend to like fresh toppings on our regular pizza, but they get cooked better while in the oven. If you’re dairy free like Ali (tries to be), get some inspiration from out Dairy Free Pizza Night Post. This technique is absolutely worth a try!
Mary & Kelly
Grilled Pizza Dough
Courtesy of ‘American Pie: My Search for the Perfect Pizza’ by Peter Reinhart
5 c Unbleached All-Purpose Flour
1 T Sugar
2 t Table Salt
1 t Instant Yeast
3 ½ T Olive Oil
1 ¾ c Room Temperature Water
- Combine together the flour, sugar, salt, yeast, 1 ½ T olive oil, and the water in the bowl of an electric stand mixer and fit it with the dough hook and mix on low speed for about four minutes, or until the dough forms a coarse ball and clears the sides and bottom of the bowl. Add more flour or water by the tablespoonful as needed. Let the dough rest for 15 minutes, then mix again on medium low speed for an additional 2-4 minutes, or until the dough is smooth, supple and tacky but not sticky. The dough should pass the windowpane test.
- Immediately divide the dough into six equal pieces. Gently round each piece into a ball and brush or rub each ball with olive oil. Place each ball inside its own zippered freezer bag. Using the remaining 2 T of olive oil, drizzle 1 t of olive oil over each ball and seal the bags closed. Let the balls sit at room temperature for 30 minutes, then refrigerate the balls for at least 3 hours or preferably overnight.
- Remove the dough balls from the refrigerator two hours before you plan to roll them out to take off the chill and to relax the gluten. At this point you can place any balls you don’t plan to use back in the refrigerator for up to three days or freeze for up to three months.
**This is only the machine version of the recipe, if you want the full version with manual instructions, buy the (Awesome) book! In fact, if you plan to make homemade pizza, it is a must read. The following is our own technique for grilling pizza, again if you want more detailed instructions, the book is an amazing resource.
Grilled Pizza
Heat your grill (or grills) for about 30 minutes allowing for a hot and a cool side.
Lay out all of your toppings and dough close at hand.
Oil the grill well (we use an onion cut in half, speared with a BBQ fork and dipped in vegetable oil).
Stretch your dough to the desired size and shape and gently place on the hot part of the grill.
Allow too cook until you see bubbles and you have good color on the bottom, about 2 minutes.
Flip the dough onto the cool side and top with desired toppings, being careful not to overload the dough.
Close the grill and allow to cook another 2-4 minutes depending on the heat of your grill. Once the cheese is melted, check the bottom of the pizza and return to the hot side to crisp if necessary. Allow to rest a few minutes. Cut and serve immediately.

Leave a Reply
Want to join the discussion?Feel free to contribute!